

Grout is ready to seal once it passes a simple water-drop test: drop some water on it, and if it beads up instead of soaking in, you’re good to go. Same-day aerosol products can sometimes go on after about 2 hours per the SameDay grout sealer TDS, but most standard cleaning jobs need 24 to 48 hours of dry time, and full stain resistance often takes 24 to 72 hours. Always check your product’s own instructions first.
TL;DR:
- Standard penetrating sealers usually need 24 to 48 hours after cleaning; some aerosol products allow application after 2 hours if the grout is clean and dry.
- Test several grout spots: water should bead rather than soak in, while dark patches or a damp paper towel indicate that drying is incomplete.
- Rinse away cleaner, remove wax, silicone, old sealer, and efflorescence, and use a neutral pH cleaner; heavy buildup or recurring salts may require professional stripping.
- Wipe unabsorbed sealer within the product’s stated window, often 5 to 10 minutes, and wait about 30 minutes between coats when a second coat is required.
- Allow about 2 hours before light foot traffic, keep the surface dry for at least 12 hours, and expect full stain resistance after 24 to 72 hours.
Table of Contents
- Why drying matters and typical wait times after cleaning
- How to test grout dryness at home (practical checks)
- Step-by-step: preparing grout for sealing after cleaning
- Step-by-step: applying grout sealer (tools, technique, coats)
- Drying, curing, traffic, and when the area can get wet again
- Maintenance after sealing: testing, re-seal intervals, and cleaners to use or avoid
- How professional prep sets up a better seal
- What the timing-first approach gets right, and where it falls short
- Thinking about professional help before you seal
- FAQ
- Sources
Why drying matters and typical wait times after cleaning
Think of grout like a sponge that just got wrung out. It looks dry on top long before the moisture deep inside is actually gone, and that trapped water is the problem. Seal too early, and the sealer can’t soak into the pores the way it’s supposed to. It sits on a damp surface, fails to bond, and you end up redoing the whole job.
There’s a real difference between “surface dry” and “ready for sealer.” Surface dry means it’s not wet to the touch. Ready means the moisture way down in the grout lines has had time to evaporate too, which takes longer than most people expect.
Here’s how that plays out by product type, per the manufacturer sheets:
- Aerosol “same-day” sealers can sometimes be applied about 2 hours after grouting or cleaning, but only on grout that’s already clean and dry, according to the SameDay grout sealer TDS.
- Standard penetrating sealers typically need 24 to 48 hours (sometimes longer) before they’ll bond properly.
- Humid air slows everything down. A basement bathroom in July dries a lot slower than a sunny kitchen in a dry Wichita spring.
- Cold temperatures slow evaporation too, so a chilly room needs extra patience.
- Dense or less porous tile holds moisture near the grout lines longer than textured, more porous tile does.
None of these are hard rules you can set your watch to. They’re starting points. The product you bought has its own Technical Data Sheet, and that sheet beats any blog post, including this one, when the two disagree.
How to test grout dryness at home (practical checks)
You don’t need lab equipment to know if your grout is ready. A few low-tech checks will tell you almost everything.
- Water-drop test: Place a few drops of water on several spots along the grout lines. If the water beads up and sits there, the grout is dry and ready. If it soaks in and darkens the surface, give it more time.
- Visual and touch check: Dry grout looks consistently light and matches its cured color edge to edge. Patches that look darker, feel cool, or feel the slightest bit damp mean moisture is still working its way out.
- Paper towel test: Press a dry paper towel firmly against a grout line for a few seconds. If it comes away damp or picks up color, the grout needs more drying time.
Pro Tip: Run the water-drop test in two or three different spots, not just one. Grout near a shower drain or in a low-traffic corner often dries slower than grout in open, airy areas.
These tests are reliable field checks, but they’re not a replacement for your product’s own guidance. The AquaMix Grout Sealer TDS recommends this same water-drop method as the standard way to confirm grout is ready, so when your homemade test and the manufacturer’s timing line up, you’re in good shape.
Step-by-step: preparing grout for sealing after cleaning
Sealer only works as well as the surface underneath it, so it’s important to follow the expert advice on when to seal pavers and similar outdoor surfaces to ensure durability and longevity, as explained in Seal Pavers Right: Wait A Month After Polymeric Sand For Homeowners. Skip prep, and even a premium sealer will fail to bond right.
- Rinse the grout thoroughly after cleaning and wipe it dry, since leftover cleaner residue creates a film that blocks sealer penetration.
- If you need one more pass, use a neutral pH tile cleaner rather than anything acidic, which can etch cement grout and undermine the bond.
- Check for old wax, silicone residue, or a previous sealer coat. These all sit on top of the grout like a raincoat and stop new sealer from soaking in. Light residue can sometimes be lifted with a dedicated sealer stripper, but heavy buildup usually calls for professional stripping.
- Watch for a white, powdery film called efflorescence. It’s mineral salt pushing up through the grout, and it needs to be removed before sealing or it will keep resurfacing underneath the seal. Our guide on removing efflorescence from grout walks through how to spot it and clear it out.
- Mask off nearby baseboards, cabinetry, or fixtures with painter’s tape so stray sealer doesn’t land where you don’t want it.
- Test the sealer in a small, hidden spot first, like inside a closet or behind an appliance, to make sure it doesn’t change the color or sheen of your grout in a way you don’t like.
Some situations call for more than a weekend’s worth of elbow grease. Heavy contamination, stubborn staining that won’t lift, or efflorescence that keeps coming back are signs the grout needs a deeper clean before sealer will ever hold. A professional extraction-first cleaning pulls contaminants out of the pores instead of just pushing them around, which gives sealer an actual clean surface to grip. If you’re curious what that process looks like, our piece on tile and grout cleaning methods breaks it down.
Step-by-step: applying grout sealer (tools, technique, coats)
Once your grout passes the dryness test, the application itself is pretty forgiving, as long as you don’t rush the wiping step.
Most homeowners use a penetrating sealer, which soaks into the grout and protects from the inside without changing its look. Topical sealers sit on the surface instead and add a bit of sheen, but they wear faster underfoot. You’ll also choose between aerosol cans and liquid-with-applicator bottles. Aerosols are faster to apply evenly, especially for the “same-day” products, while liquid applicators give you more control over how much sealer lands exactly where you want it.
Tools to have ready:
- Spray can or a small foam or bristle applicator
- A soft-bristle brush or sponge for working sealer into the lines
- Clean microfiber towels, several of them
- Nitrile gloves
- A respirator if you’re using a solvent-based sealer, plus a window cracked for ventilation
Application steps:
- Test a small section first and confirm you like the result.
- Apply an even coat along the grout lines, working in small sections so you don’t get ahead of yourself.
- Wipe away any sealer that hasn’t soaked in within the window your product specifies, often 5 to 10 minutes, to avoid a hazy film once it dries.
- If a second coat is called for, wait about 30 minutes between coats, a timing echoed in the UltraCare penetrating sealer TDS.
- Run the water-drop test again after the final coat to confirm the seal took.
Pro Tip: Buff with a dry microfiber towel right after wiping off excess sealer. It catches the last bit of residue before it has a chance to dry into a dull haze on the tile.
Skip hot, windy days if you can. Fast flash-drying leads to uneven coverage, and you’ll end up with patchy protection instead of a clean seal.
Drying, curing, traffic, and when the area can get wet again
Sealing is done, but the clock isn’t. There’s a difference between “walk on it” and “mop it like normal again.”
- Light foot traffic is often fine after about 2 hours, based on typical manufacturer windows like the AquaMix TDS.
- Keep the area completely dry, no mopping, no spills, no pet water bowls, for at least 12 hours.
- Full cure and stain resistance generally lands somewhere between 24 and 72 hours, depending on the specific product.
- Humidity and cool temperatures stretch all of these windows out, sometimes by a full extra day.
- A little airflow speeds things along safely: crack a window, run a bathroom fan, or set the HVAC to a moderate, steady temperature instead of blasting heat or AC.
As a rule of thumb, hold off on heavy cleaning, red wine nights, or muddy dog paws in that spot for 48 to 72 hours when you can swing it. The sealer is still settling in, and giving it that buffer pays off in how well it holds up down the road.
Maintenance after sealing: testing, re-seal intervals, and cleaners to use or avoid
Sealer doesn’t last forever, and the good news is checking it takes thirty seconds. Drop some water on the grout every so often. Beads mean you’re covered. Soaking in means it’s time to reseal.
- Most sealed grout needs a fresh coat somewhere between 1 and 3 years, though some premium formulations claim protection for up to 3 to 5 years or longer depending on traffic and care, according to UltraCare Grout Sealer product documentation.
- High-traffic hallways and kitchens wear out sooner than a guest bathroom nobody uses.
- Stick with neutral pH cleaners for routine mopping.
- Skip vinegar, bleach, and ammonia. These break down cement grout and shorten sealer life, a point industry guidance keeps coming back to.
- Spot clean spills and stains as soon as they happen instead of letting them sit and soak.
A simple seasonal habit, mop with the right cleaner, spot clean fast, run the water test once a year, keeps you from ever facing a full grout overhaul.
How professional prep sets up a better seal
Grout holds onto more than regular mopping ever pulls out. Years of foot traffic, cooking grease, and cleaning product residue settle deep into the pores, and that buildup is exactly what keeps sealer from bonding the way it should. Professional deep cleaning that combines hot water with real extraction pulls those contaminants out instead of just moving them around the surface, which leaves grout genuinely clean, not just clean-looking.
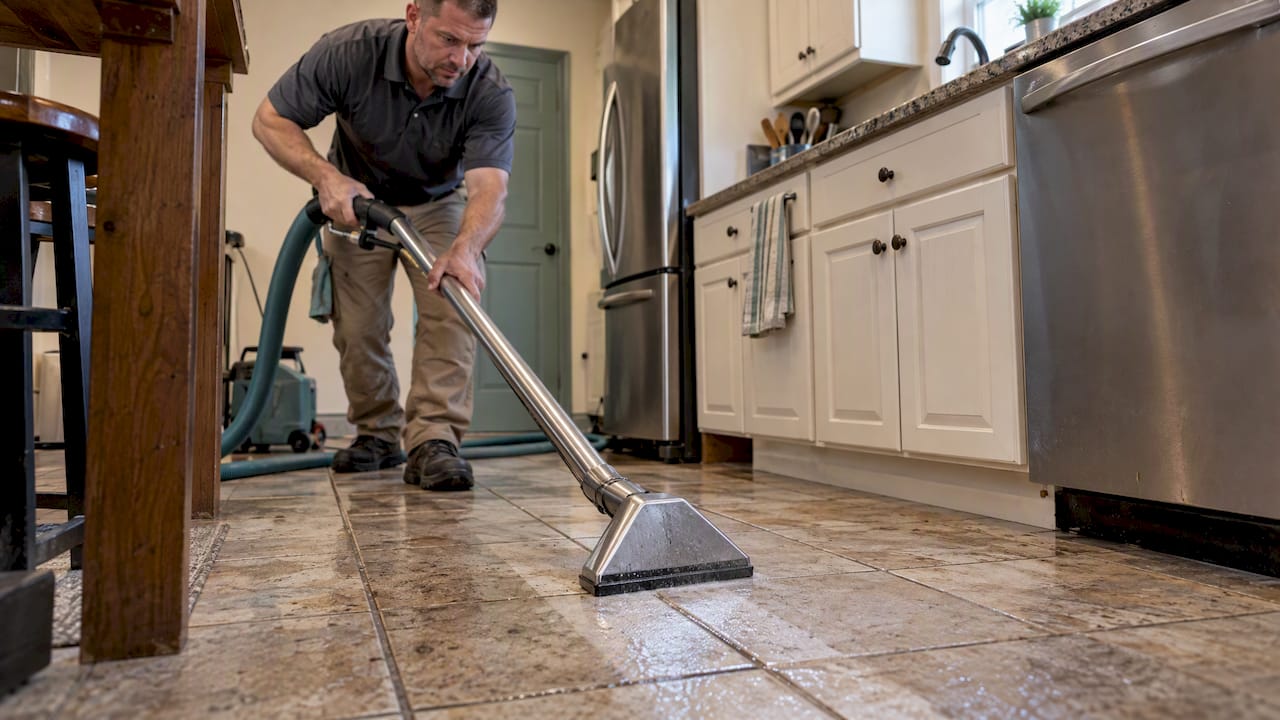
That matters most in a few situations: high-traffic kitchens and entryways, homes where a sealing job needs to happen fast, and grout dealing with stains or buildup that a weekend of scrubbing won’t touch. Our tile and grout cleaning service and tile floor polishing are built around exactly that kind of job, getting grout to a genuinely clean, dry baseline so whatever sealer goes on next actually has a chance to work.
What the timing-first approach gets right, and where it falls short
Most grout advice online treats drying time like a fixed number: wait 24 hours, done. That’s not wrong, but it’s incomplete. The water-drop test matters more than the clock on the wall, because a humid bathroom and a dry kitchen are never going to cure at the same speed, no matter what the calendar says.
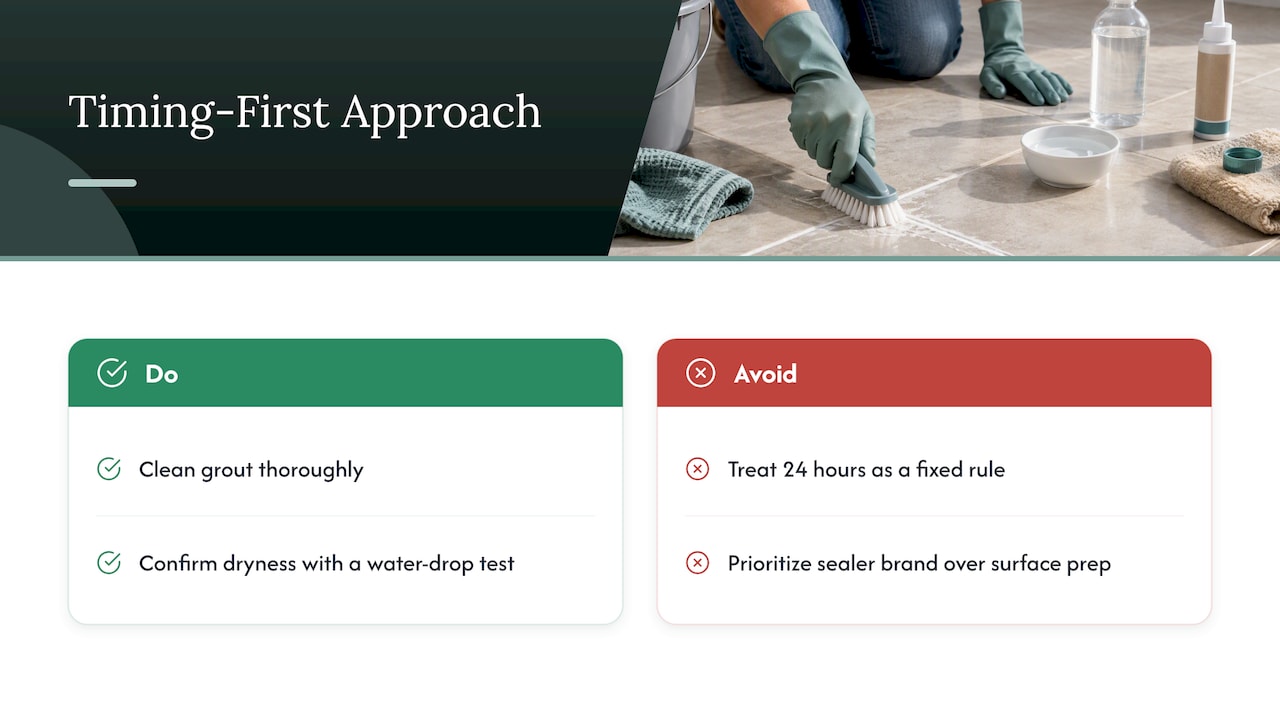
The bigger blind spot is prep. Homeowners spend all their attention on sealer brand and coat count, and almost none on what’s actually sitting in the grout before that first coat goes on. Residue, old sealer, efflorescence, any of it will quietly sabotage a sealing job no matter how carefully you follow the timing windows.
If we had to pick one priority: get the grout genuinely clean and confirm it with a water-drop test before worrying about which sealer to buy. The product matters less than the surface it’s going on.
— chris
Thinking about professional help before you seal
If your grout has years of buildup, stubborn staining, or you just want the job done right before you commit to sealing it yourself, that’s exactly where we come in. Our deep steam cleaning and extraction pull out the residue and contaminants that block sealer from bonding, getting grout to a genuinely clean, dry starting point instead of just a surface wipe-down.

We offer tile and grout cleaning, scuff removal, and tile floor polishing for homes and businesses that want a professional reset before sealing.
- A deep clean that reaches into grout pores, not just the surface
- Tile floor polishing to finish the job looking its best
- A satisfaction guarantee on the work we do
- Our Simple Club subscription plans, Standard Membership at $20 per month and Premium Membership at $40 per month, for ongoing care so grout and tile stay in shape between deep cleans
If you’re in the Wichita area and want your tile and grout professionally prepped before you seal, get a quote on our tile cleaning page and we’ll take it from there.
FAQ
How long should I wait to seal grout after cleaning it?
Most standard grout needs 24 to 48 hours to dry fully after cleaning before it’s ready for sealer, though some aerosol “same-day” products allow application after about 2 hours if the grout is already clean and dry. The safest check is a water-drop test: if water beads instead of soaking in, you’re ready.
Why do builders not seal grout?
Builders often skip sealing because it’s considered homeowner maintenance rather than part of installation, and some grout products include built-in additives that reduce or remove the need for a separate sealer. It’s worth checking with the grout manufacturer to see if the product already has sealing properties built in, as industry guidance notes.
Should you clean grout before sealing?
Yes. Cleaning removes dirt, grease, and old residue that would otherwise sit between the sealer and the grout and block proper bonding. Rinse thoroughly and let the grout dry completely, confirmed with a water-drop test, before applying any sealer.
Can I put grout sealer on old grout?
Yes, as long as the old grout is clean, dry, and free of leftover wax, silicone, or a prior sealer coat that would stop new sealer from soaking in. Heavily stained or contaminated grout often needs a deeper clean first, since sealer applied over residue won’t bond properly no matter how carefully it’s applied.
Sources
- SameDay grout sealer TDS (Custom Building Products)
- UltraCare penetrating sealer TDS (MAPEI/UltraCare)