

Scrub it with a stiff brush and the right cleaner, keep the fan running, and dry the tile completely. That handles most of it. If the discolored area covers more than about 10 square feet, per EPA guidance, or you smell musty air behind the wall, stop scrubbing and call a pro. Never mix cleaners, per CDC guidance, and wear gloves. Specialized cleaning services can handle the jobs that go past soap and water.
TL;DR:
- Mold that smears deep into grout or causes persistent musty odors requires professional intervention, especially if the affected area exceeds 10 square feet.
- Using oxygen bleach or hydrogen peroxide is more effective for stubborn mold spots than chlorine bleach, which can weaken grout over time if used repeatedly.
- Regular maintenance, including squeegeeing, running the exhaust fan, and sealing grout every 12 to 18 months, helps prevent mold from returning.
- Repeated cleaning without addressing underlying moisture issues often results in recurring mold, making regrouting or leak repairs necessary.
- Visible mold that keeps coming back despite good ventilation and sealing indicates a hidden moisture source that needs professional assessment and repair.
Table of Contents
- Is That Shower Grout Mold, or Just Mildew?
- How to Remove Mold From Grout: Step-by-Step
- When Should You Call a Mold Remediation Pro?
- How to Keep Shower Grout Mold From Coming Back
- What Home Service Simple Handles When DIY Isn’t Enough
- Why Shower Grout Mold Is More Than a Cosmetic Problem
- Long-Term Habits That Keep Grout Mold From Coming Back
- Mold vs. Mildew: Which One Actually Damages Grout?
- The DIY-First Rule Most Grout Advice Gets Wrong
- Get Grout Mold Handled Right the First Time
- Sources
- FAQ
Is That Shower Grout Mold, or Just Mildew?
Not every dark line in your grout is mold. A lot of it is mildew, and the difference changes what you should do next.
Mildew sits on the surface. It’s usually flat, powdery, and gray or white, and a damp rag with a little scrubbing wipes it right off. Mold is a different animal. It tends to look raised, slimy, or fuzzy, ranges from black to pink to greenish, and often carries a musty smell that lingers even after you’ve cleaned the visible spot. If you press a cotton swab into the discoloration and it smears deep into the grout line rather than lifting off, you’re probably dealing with mold that has worked into the material, not just sat on top of it.
Location matters too. Mold on the grout lines themselves is one problem. Mold creeping along the caulk where tile meets tub, or dark staining that runs behind the tile edge, is a different and often bigger problem, since it points to trapped moisture rather than a surface cleaning issue.
Quick diagnostics before you grab a cleaner:
- Wipe test: does a damp cloth remove it, or does color remain after wiping?
- Smear test: press a swab into the spot. Does it stay contained or spread into the porous grout?
- Smell check: a persistent musty odor after cleaning usually means mold, not mildew.
- Size check: measure the affected area against the EPA’s 10 square foot benchmark for do-it-yourself cleanup.
The 24 to 48 hour window matters here too. Grout is porous cement, and once it stays wet past that window, mold has enough time to establish itself, especially in bathrooms with weak exhaust fans or where soap film keeps holding moisture against the surface. That’s the mechanical root of most shower grout mold, more than any single brand of cleaner you use or skip.
How to Remove Mold From Grout: Step-by-Step
This is the order that works: mild methods first, escalate only if needed, and save the mechanical fix for grout that’s too far gone to clean.
1. Prep the space and protect yourself.
Open a window, run the exhaust fan, and if you have neither, prop the bathroom door and run a box fan facing out. Put on rubber gloves and safety glasses before you touch anything. Clear shampoo bottles, mats, and loofahs out of the shower so you’re not just moving mold spores from one surface to another.
2. Start mild: dish detergent, vinegar, or baking soda paste.
For light mildew or early-stage discoloration, plain dish detergent and water with a stiff nylon brush often does the job. For grout that’s turning gray or black, undiluted white vinegar works well: spray it on, let it sit 10 to 15 minutes, then scrub with a stiff brush or an old toothbrush for tight lines. Baking soda paste (roughly three parts baking soda to one part water) adds gentle abrasion, which helps when vinegar alone isn’t lifting stains. Rinse thoroughly and dry the area with a towel rather than letting it air dry.
3. Step up to hydrogen peroxide or oxygen bleach for stubborn spots.
Oxygen-based bleach, sold as sodium percarbonate powder, mixed into a paste with water is even more effective for grout specifically. Both penetrate porous grout better than chlorine bleach, which tends to bleach the surface white without killing what’s growing deeper in the material.
4. Use chlorine bleach carefully, and only when it’s the right tool.
Diluted chlorine bleach (about one cup per gallon of water) can knock out surface mold fast, but it has real limits on grout specifically. Bleach kills what it touches on the surface but doesn’t fully penetrate cementitious grout, and using it repeatedly over months can actually degrade the grout itself, making it more porous and more mold-prone over time. Never combine bleach with vinegar, ammonia, or any other cleaner. The CDC is direct about this: mixing bleach with ammonia produces toxic vapors, and mixing it with vinegar releases chlorine gas. One cleaner at a time, always, with the fan running the whole time you’re using it.
5. Go mechanical if the mold has worked into the grout matrix.
If dark staining remains after multiple rounds of scrubbing and dwell time, the mold has likely penetrated below what any surface cleaner can reach. At that point, a grout saw or carbide-tipped scraper can rake out the top layer of affected grout for re-application. If staining runs the full depth of the grout line or into the caulk, regrouting or recaulking that section is the honest fix, not another bottle of cleaner.
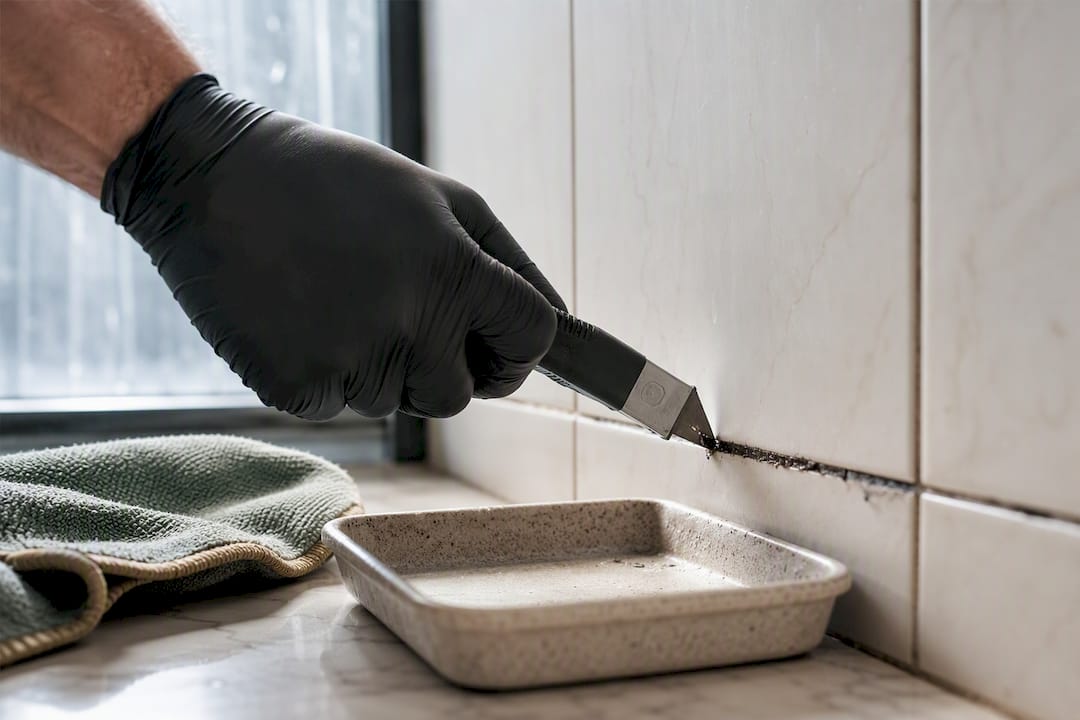
Pro Tip: Test any cleaner on a small hidden section of grout first, especially colored or older grout, and let oxygen bleach paste dwell 15 to 30 minutes before scrubbing. Rushing the dwell time is the most common reason people think a product “didn’t work” when it just needed more time to break down the mold structure.
Use a brush stiff enough to dislodge buildup but not so stiff it gouges the grout surface, since gouged grout just gives mold more surface area to grip next time. Whatever method you land on, rinse completely and dry the area promptly. That last step matters as much as the cleaner itself.
When Should You Call a Mold Remediation Pro?
The EPA’s own benchmark is straightforward: if the contaminated area is larger than about 10 square feet, most homeowners can handle it with detergent, water, and ventilation. Past that size, or when certain warning signs show up, it’s time to bring in someone who does this for a living.
Call a professional if you notice:
- A musty smell that persists even after the visible mold is gone
- Grout or drywall that feels soft, crumbly, or damaged when you press on it
- Mold that keeps coming back within weeks of a thorough cleaning
- Any sign of active water intrusion, like a leak behind the tub surround or discoloration spreading beyond the shower area
- An affected area larger than the EPA’s 10 square foot DIY guideline
A remediation professional does more than scrub harder than you can. They check for hidden leaks behind the tile, assess whether the substrate underneath has taken on water damage, and determine whether containment is needed before work starts, standard practice for anything beyond a small surface job under EPA remediation guidelines. They’ll also tell you honestly whether a section needs full regrouting or re-tiling rather than another cleaning pass. If you want a sense of what that kind of job runs before you call anyone, Home Service Simple’s tile and grout cleaning cost breakdown is a solid starting point. And if the musty smell seems to be traveling through the house rather than staying put in the bathroom, it’s worth reading about mold in air ducts too, since HVAC systems can spread spores far past where they started.
How to Keep Shower Grout Mold From Coming Back
Cleaning mold off is only half the job. If the bathroom stays humid past the danger window, it grows right back, usually within a month or two.
Two habits do most of the work here.
Daily and weekly routine:
- Squeegee the walls and glass right after every shower. Thirty seconds, that’s it.
- Run the exhaust fan during the shower and for 15 to 30 minutes after, per safety guidance from InspectandTest on cutting post-shower humidity.
- Keep shampoo and soap bottles off the shower floor so water and residue don’t pool underneath them.
- Wipe down grout lines with a vinegar spray once a week as light, preventive maintenance.
- If your bathroom door design traps steam, look at ventilation-friendly door options that let humidity escape faster.
Sealing grout is the other half of prevention, and it matters more than most people realize. A penetrating silane-siloxane sealer soaks into the grout and blocks moisture from the inside, rather than sitting on top like a topical coating does. Reapply it every 12 to 18 months for reliable protection. For showers that keep growing mold no matter what you try, epoxy grout is the long-term answer: it’s essentially nonporous, so it removes the food source and hiding spot mold needs in the first place. It costs more upfront than standard cementitious grout, but if you’re on your third or fourth mold cleanup in a single grout job, that upfront cost usually pencils out fast.
Pro Tip: If mold keeps returning to the same spot despite good ventilation and sealing, check for a hidden plumbing leak or missing insulation behind that wall before you blame your cleaning routine. Recurring mold in one exact location, cleaning after cleaning, is often a moisture source problem, not a habit problem.
If you’re mid-renovation anyway and dealing with chronic moisture in an older bathroom, it’s worth looking at waterproofing and insulation fixes during a remodel rather than fighting the same mold every few months in a bathroom that was never sealed right to begin with.
What Home Service Simple Handles When DIY Isn’t Enough
Some professional cleaning services are known for deep steam cleaning that lifts dirt and allergens without leaving residue behind, and that same attention to detail carries over into tile and grout work. The team has handled tile and grout jobs across Wichita long enough to know the difference between a cosmetic stain and a moisture problem that needs real remediation, not just a stronger cleaner.
Call in professional cleaning services when the mold covers a larger area than you can comfortably scrub yourself, when the musty smell won’t quit no matter how many rounds of cleaning you’ve done, or when you suspect moisture is coming from somewhere you can’t see, like behind the tub surround or through nearby ductwork.
A typical visit starts with an inspection of the affected grout and surrounding area, followed by a written estimate before any work begins. From there, the crew handles the actual remediation, whether that’s deep cleaning, spot regrouting, or flagging a bigger moisture issue that needs a plumber’s attention. Every job is backed by a satisfaction guarantee, and customers who want ongoing care without rebooking every few months can roll tile and grout maintenance into the Simple Club subscription plan alongside their regular carpet and upholstery service.
Why Shower Grout Mold Is More Than a Cosmetic Problem
Dead mold spores don’t stop being allergenic just because the mold looks gone. EPA and CDC guidance both note that dried, dead spores can still trigger reactions, which is why drying the area thoroughly matters as much as whatever cleaner killed the mold in the first place.
For most healthy adults, occasional exposure to shower grout mold means minor irritation: a scratchy throat, some sneezing, maybe a headache from breathing bleach or mold spores in a poorly ventilated bathroom. But for people with asthma, chronic respiratory conditions, or mold allergies, repeated exposure in a small, enclosed, frequently used room can trigger more persistent symptoms, including wheezing, nasal congestion, and skin irritation from direct contact during showering.
Infants, older adults, and anyone with a compromised immune system face higher risk from prolonged exposure, which is one more reason not to just paint over a mold problem or hope it dries out on its own. The good news is that the fix for the health risk and the fix for the cosmetic problem are the same fix: remove the mold, dry the surface, and keep it dry. There’s no separate health protocol beyond doing the cleaning and prevention steps correctly and consistently.
Long-Term Habits That Keep Grout Mold From Coming Back
A one-time deep clean buys you weeks, maybe a couple of months. A maintenance routine buys you years.
Build a simple monthly check into your calendar: look closely at grout lines and caulk edges for any early graying or dark specks, and treat them immediately with vinegar or hydrogen peroxide before they spread. Catching mold in its first week is dramatically easier than catching it after it’s had a month to settle in.
Rotate your bathroom cleaner occasionally rather than relying on one product forever. Grout and mold species can build up a tolerance to a single active ingredient over repeated exposure, so switching between vinegar, hydrogen peroxide, and oxygen bleach every few cleanings keeps things from getting stagnant.
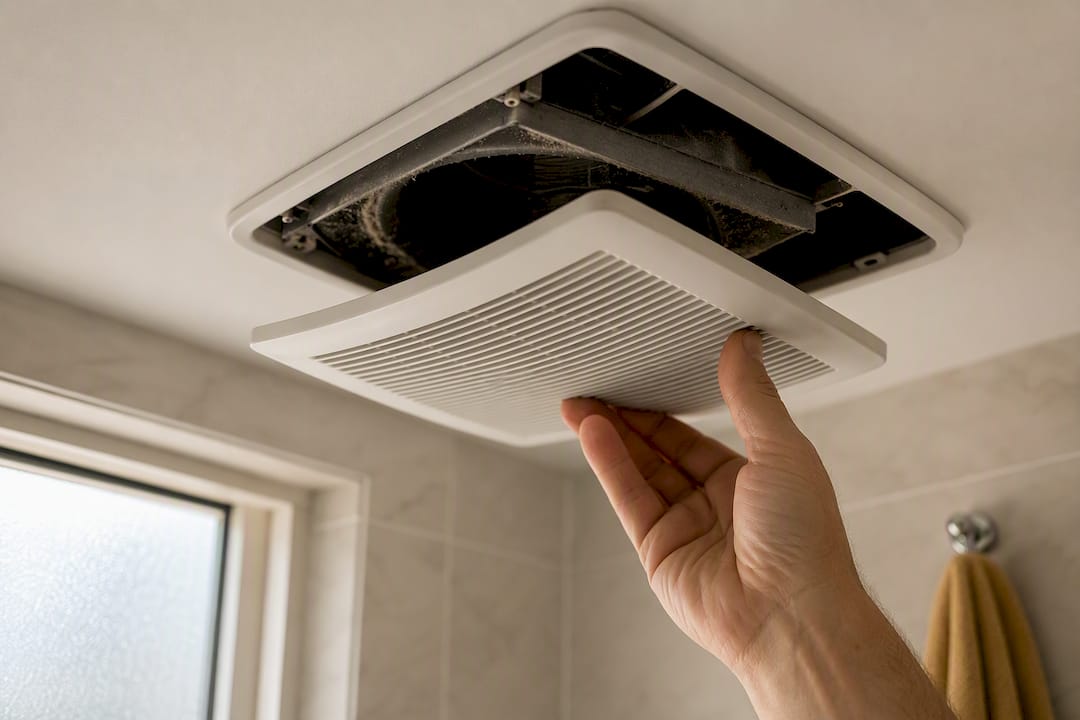
Check your exhaust fan’s actual performance once or twice a year, not just whether it turns on. A fan clogged with dust moves far less air than it should, even though it sounds like it’s working fine. And if you’ve never resealed your grout, mark a date. Twelve to eighteen months after the last sealing is when moisture protection starts breaking down, right when most people have completely forgotten they ever sealed it in the first place.
Mold vs. Mildew: Which One Actually Damages Grout?
The mildew versus mold distinction isn’t just cosmetic. It determines whether your grout is fine long-term or slowly failing underneath the surface.
Mildew stays on top of the grout and doesn’t feed on the material itself. Clean it off and the grout underneath is exactly as structurally sound as it was before. It’s an appearance problem, full stop.
Mold is different because certain species can actually break down organic binders and weaken the cement matrix over time, especially in grout that’s stayed damp for extended periods. That’s part of why mold-affected grout sometimes crumbles or feels soft when pressed, while mildew-affected grout never does. The mold isn’t just sitting on the surface; it’s slowly compromising what’s holding your tile in place.
This is also why repeated bleach use matters more than people think. Bleach can lighten mold’s appearance without addressing the underlying moisture or fully killing what’s embedded, and the grout keeps degrading underneath a surface that looks clean. If your grout has felt increasingly rough, pitted, or crumbly over a year or two of periodic mold problems, you’re likely looking at structural wear from mold, not just a string of stubborn stains. That’s the point where cleaning stops being enough and regrouting becomes the actual fix.
The DIY-First Rule Most Grout Advice Gets Wrong
Most cleaning advice treats every shower mold problem the same way: buy a stronger product, scrub harder, repeat. That’s backwards. The EPA’s 10 square foot benchmark isn’t a suggestion, it’s a genuinely useful decision rule, and treating a bigger, recurring, or smelly mold problem as a product problem instead of a moisture problem is how homeowners end up cleaning the same spot every six weeks for two years straight.
The advice that actually holds up is boring: start mild, escalate only as needed, never mix cleaners, and dry the surface completely every single time. Where conventional advice falls short is skipping the “why does this keep coming back” question entirely. A fan that doesn’t move air, a leak nobody’s checked, ungrouted caulk gaps. Those things matter more than which bottle you’re holding.
If you’re past the point where scrubbing is fixing it, or you’re just tired of doing this every month, that’s the signal to bring in someone who deals with grout, moisture, and ventilation for a living instead of guessing again with a new cleaner.
— chris
Get Grout Mold Handled Right the First Time
Store shelf cleaners can knock out light mildew, but they don’t fix a moisture problem, and they won’t tell you whether your grout needs replacing instead of scrubbing. Professional cleaning services look at what’s actually causing the mold to keep coming back, not just what will make it disappear for a week.

If your shower grout keeps darkening no matter how often you clean it, or you’re dealing with an area bigger than a quick weekend job, it’s worth having a professional take a real look before you buy another bottle of cleaner. Professional cleaning crews often work in local areas on tile, grout, and moisture issues that cause recurring mold, sometimes with satisfaction guarantees that apply across services. Request an itemized estimate before your next deep clean, or check out customer reviews from homeowners who’ve had similar shower mold problems solved for good. Book a visit and get an honest answer on whether you need a cleaning or a repair.
Sources
- Mold cleanup in your home (EPA)
- Mold cleanup guidance (CDC)
- Mold on grout between tiles: causes & fixes (IndoorHumidity)
FAQ
Is It Normal to Have Some Mold in Shower Grout?
Light mildew or occasional grout discoloration is common in humid bathrooms, but it’s not something to ignore. It signals that the surface is staying wet too long and needs better drying habits or ventilation.
How Do I Remove Black Mold From Shower Grout?
Start with undiluted vinegar or a hydrogen peroxide application, scrub with a stiff brush, then rinse and dry completely. For stubborn black staining, oxygen-based bleach paste with a 15 to 30 minute dwell time typically outperforms repeated chlorine bleach use.
What Actually Kills Mold in Shower Grout?
Hydrogen peroxide, oxygen-based bleach, and diluted chlorine bleach all kill surface mold, but oxygen bleach and hydrogen peroxide penetrate porous grout more effectively. Whatever you use, never mix it with another cleaner, since combining bleach with vinegar or ammonia produces dangerous fumes.
How Do I Remove Mold From Grout Without Damaging It?
Use a stiff nylon brush or an old toothbrush rather than a metal scraper, and avoid gouging the grout surface while scrubbing. Rinse and dry thoroughly after every cleaning session, since leftover moisture undoes the benefit of the cleaning itself.
When Should I Hire a Professional Instead of Cleaning It Myself?
Call a professional once the affected area exceeds roughly 10 square feet, per EPA guidance, or if mold keeps returning after repeated thorough cleanings. Home Service Simple can assess whether the issue is cosmetic or points to a hidden moisture problem behind the tile.