

If you’re staring at white powder dusting your grout lines like somebody sprinkled powdered sugar on your bathroom floor, that’s almost always efflorescence. Dry-brush it first. If it flakes off easy, you’re dealing with mineral salts, not mold or a failed installation.
Here’s your move right now:
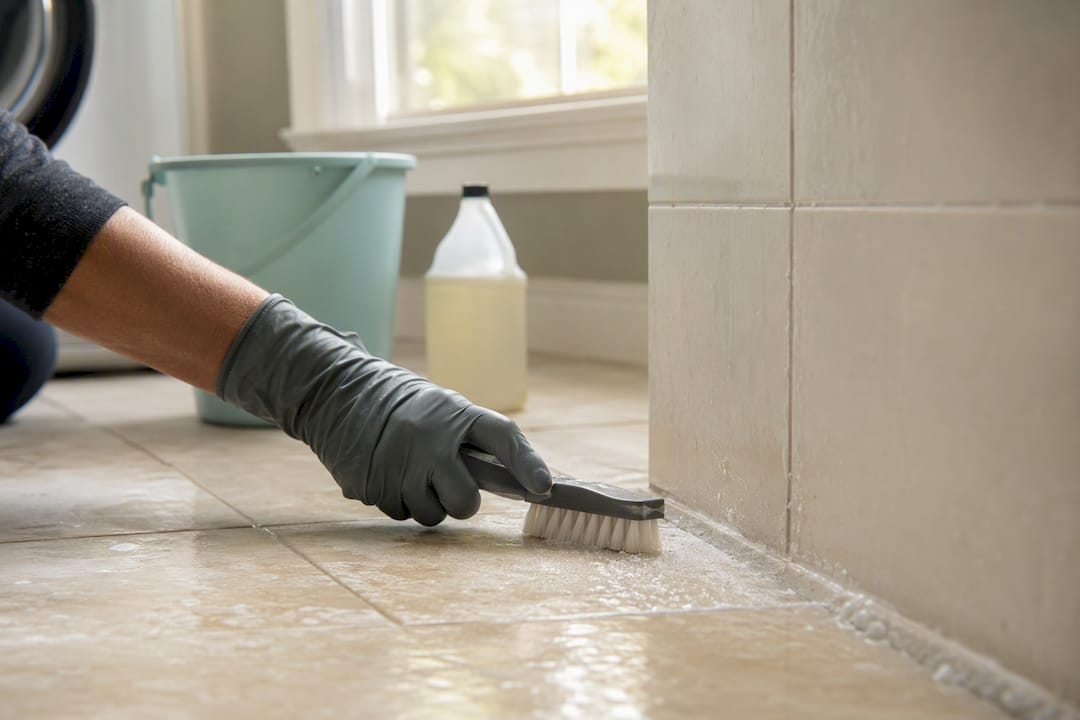
- Dry-brush the area with a stiff nylon brush and see if the powder lifts off clean.
- Do a damp-cloth test. Wipe with plain water. If it dissolves and disappears, that confirms salts.
- Stop reaching for the heavy-duty cleaners or sealer. Sealing over an active moisture problem just traps it underneath.
Pro Tip: Protect grout lines and any natural stone nearby before you test anything. Never grab muriatic acid as your first move. It’s overkill for a Tuesday-afternoon cleanup and it can eat right through colored grout.
Key Takeaways
Efflorescence on grout comes from soluble salts, moisture, and a pathway working together, and recurring deposits after cleaning almost always mean active moisture, not a cleaning failure.
| Point | Details |
|---|---|
| Identify before you clean | Dry-brush and damp-test first; if it dissolves in water with no smell, it’s efflorescence, not mold. |
| Clean least aggressive first | Start with dry brushing and water, then neutral cleaner, then sulfamic-acid cleaners only for stubborn cases. |
| Recurrence means moisture | Deposits returning within days or weeks point to an active leak or migration path, not a cleaning issue. |
| Choose the right grout | Low-porosity, polymer-modified, or epoxy grouts resist efflorescence far better than standard cement-based grout. |
| Call a pro when it repeats | Home Service Simple offers moisture-aware tile and grout cleaning and inspection for cases that keep coming back. |
Where to Learn More About Grout Efflorescence
- Tile Council of North America sets the industry standard on white residue diagnosis and sealer cautions.
- MAPEI’s technical bulletin covers cleaning progression and cure-time guidance.
- LATICRETE’s efflorescence bulletin details non-Portland-cement grout alternatives.
- Original Mission Tile’s guide explains why recurring deposits point to below-tile moisture.
Table of Contents
- What Is Efflorescence on Grout, Exactly?
- How Does Efflorescence Actually Form?
- Efflorescence vs. Mold vs. Grout Haze: How to Tell Them Apart
- How Do You Remove Efflorescence From Grout?
- When Should You Call a Pro Instead of Cleaning Again?
- How Do You Prevent Efflorescence From Coming Back?
- Will Efflorescence Come Back, and What Should You Expect?
- How Home Service Simple Handles Tile and Grout Cleaning
- Sources
- FAQ
What Is Efflorescence on Grout, Exactly?
Efflorescence is a fine, white, powdery or crystalline mineral deposit that shows up when water dissolves salts inside your tile installation, then carries them to the surface and evaporates, leaving the crystals behind. Think of it like the ring around a coffee mug, except it’s minerals instead of coffee.
Look for a chalky or slightly sparkly white film, usually clinging to grout lines, edges, and perimeters where tile meets a wall or transition strip. Showers, patios, and anywhere near a concrete slab are efflorescence hot spots.
It’s cosmetic, most of the time. But it’s also a messenger. It’s telling you moisture moved through your installation, and that’s worth paying attention to.
How Does Efflorescence Actually Form?
Three things have to line up for efflorescence to happen, and if any one of them is missing, you won’t get it:
- Soluble salts have to be present in the grout, mortar, or slab. Cement-based products almost always carry some.
- Moisture has to show up to dissolve those salts and get them moving.
- A pathway has to exist for that salty water to travel through porous grout or mortar to the surface, where it evaporates and leaves crystals behind.
The salts themselves usually come from somewhere specific. Cement-based grout and thinset are common culprits. So is the concrete slab underneath your floor, or the mortar bed holding your tile in place. Even the water used to mix the grout can introduce salts if it’s not clean.
Where you see the deposits matters too. New installations often show a light haze near the perimeter or transition joints during the first few weeks. That’s usually just curing moisture working its way out, and it tends to fade. Deposits that keep showing up in showers, near floor drains, or on exterior decks after rain point to something more active than a curing slab.
Efflorescence vs. Mold vs. Grout Haze: How to Tell Them Apart
Not every white residue on grout is efflorescence, and mixing them up leads to the wrong fix. Here’s a fast way to sort it out:
- Efflorescence: dry, powdery, dissolves in water, no smell, brushes off easily.
- Mold or mildew: fuzzy or slimy texture, often gray-black or greenish, musty smell, doesn’t dissolve with water.
- Grout haze from cleaning too early: filmy residue left on the tile surface itself (not just the grout lines), often from cleaning before the grout fully cured.
- Sealer bloom: a milky, hazy film from a topical acrylic sealer trapping moisture underneath, which the Tile Council of North America notes can mimic true efflorescence almost perfectly.
Run the test-patch: dry brush, then damp cloth, then a diluted neutral cleaner if needed. If it dissolves and vanishes with plain water, you’ve got salts. If it needs solvent or scrubbing to budge, you’re likely dealing with sealer haze instead.
How Do You Remove Efflorescence From Grout?
Start with the gentlest method and only escalate if it doesn’t work. That’s the rule every legitimate cleaning guide follows, and it saves your grout from unnecessary damage.
- Dry-brush first. A stiff nylon brush knocks loose surface crystals without introducing more water to feed the cycle.
- Move to water and a stiff brush. Plain water, scrubbed gently, dissolves and lifts a lot of mild efflorescence on its own.
- Try a neutral pH cleaner if water alone doesn’t cut it. This handles moderate buildup without touching your grout color.
- Use a sulfamic-acid-based cleaner sparingly for stubborn deposits. Products in the UltraCare line are a common trade example, formulated specifically for mineral deposits on tile and grout.
- Reserve professional-strength acidic treatments for last resort, and only with gloves, ventilation, and a tested patch first.
MAPEI’s technical guidance is blunt about the order of operations: begin with the least destructive methods, and only bring in acid-based cleaners for stubborn residue that won’t budge otherwise, because acids can strip grout color and damage the surface if you’re not careful.
A few things to keep off your list entirely:
- Muriatic acid as a first response. It’s aggressive, it’s dangerous without proper ventilation, and it’s rarely necessary.
- Abrasive scrub pads on natural stone tile. They’ll scratch faster than they’ll clean.
- Scrubbing hard enough to wear down the grout’s pigment. You’ll trade white powder for a blotchy, uneven grout color, which is arguably worse.
If your grout is epoxy based, you’re in luck. Epoxy resists efflorescence almost entirely because it’s not cement-based, so you likely won’t need this whole process again. If you’ve got a penetrating sealer already down, stick with cleaners labeled safe for sealed surfaces so you don’t strip protection you already paid for.
When Should You Call a Pro Instead of Cleaning Again?
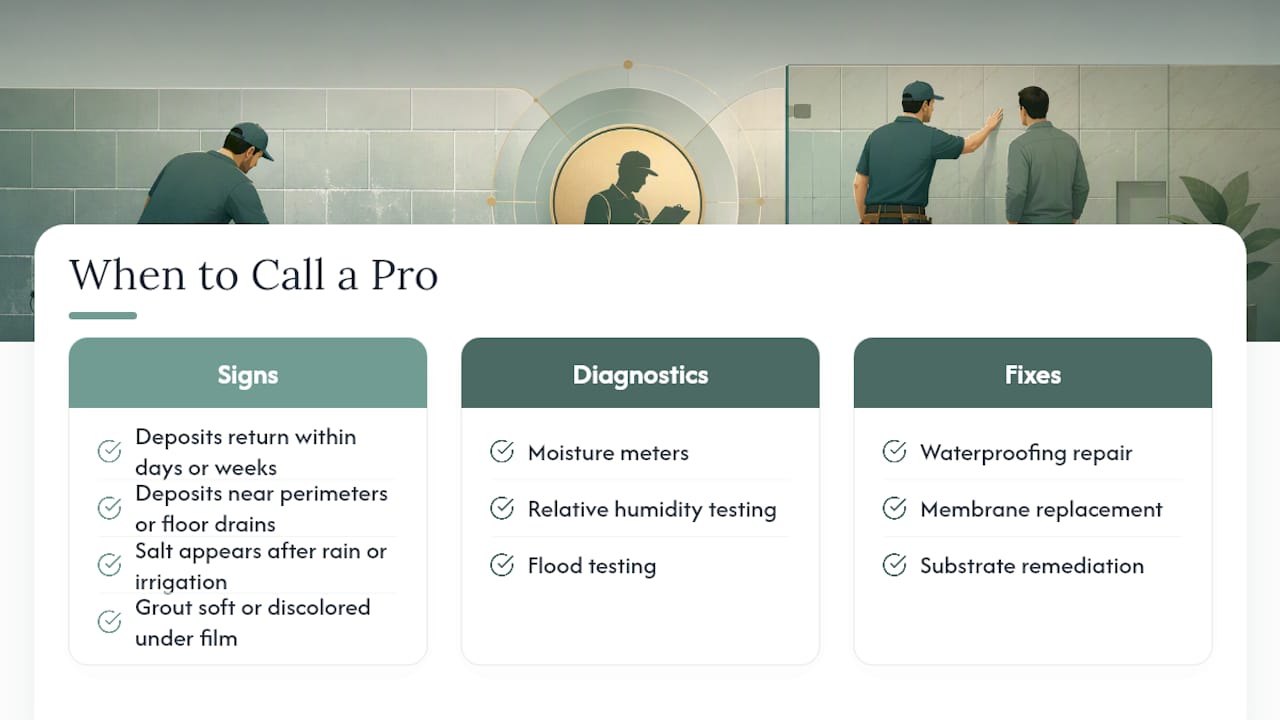
Some signs mean you’re not looking at a cleaning problem anymore. You’re looking at a moisture problem, and cleaning it repeatedly just treats the symptom.
Watch for deposits that keep coming back within days or weeks of cleaning, efflorescence concentrated near perimeters or floor drains, salt appearing right after rain or irrigation, or grout that feels soft or discolored underneath the white film. Any of those point to water still moving through the system.
Professionals investigate with moisture meters, relative humidity testing, or flood testing to find exactly where water is entering and how it’s traveling. If you’re dealing with visible leaks, widespread deposits across multiple rooms, or substrate that feels compromised, that’s your call-a-pro trigger. The fix at that point usually involves waterproofing repair, membrane replacement, or substrate remediation, not another bottle of cleaner.
How Do You Prevent Efflorescence From Coming Back?
Prevention comes down to one of two moves: stop the moisture path, or reduce the salts available to travel it. Everything below falls into material choice, moisture control, or construction detailing.
- Choose low-porosity, polymer-modified grouts, or epoxy grout where budget and application allow it.
- Consider rapid-setting calcium-aluminate mortars for situations where standard cement products keep causing problems, an approach LATICRETE’s technical bulletin recommends for chronic cases.
- Use potable water for mixing grout and thinset. Contaminated mixing water is an overlooked source of extra salts.
- Install vapor retarders and waterproofing membranes anywhere moisture exposure is likely, like showers and exterior installations.
- Respect cure times. Concrete slabs typically need a minimum time to cure properly, often around four weeks, with longer durations recommended in cooler or more humid conditions.
Pro Tip: Before you tile, check substrate moisture with a meter rather than guessing. And if you’re sealing afterward, skip topical acrylic sealers. They trap moisture underneath and can produce a white haze that looks exactly like the efflorescence you were trying to prevent. A penetrating, vapor-permeable sealer applied after the substrate is confirmed dry is the safer bet.
Will Efflorescence Come Back, and What Should You Expect?
Take photos, note the date, and track the location each time you clean. That simple habit tells you fast whether you’re improving or just chasing the same spot.
Deposits that fade over a few weeks to months, especially in a newer installation, are usually just curing moisture working itself out. Deposits that return again and again, especially in the same spot, mean there’s an active moisture source that a simple wipe-down isn’t going to fix.
Cost and timeline expectations: a DIY cleaning session is typically a same-day job. Professional diagnosis and any waterproofing repair can stretch into days or weeks, and costs run moderate to high depending on what’s actually leaking or migrating underneath.
A Publisher’s Note on Recurring White Powder
We’ve heard from plenty of homeowners convinced their grout was “failing” when it was really just salts doing what salts do. Most cases clean up fine and stay gone.
But when it keeps coming back in the same spot, that’s usually moisture talking, not the grout. If yours won’t quit, it’s worth having someone take a real look.
How Home Service Simple Handles Tile and Grout Cleaning
If you’ve already tried dry-brushing and a neutral cleaner and the white residue on your grout keeps returning, that’s your sign to bring in someone who can actually diagnose the moisture, not just scrub the surface again.

Home Service Simple’s tile and grout cleaning service starts with a visual diagnosis and a moisture check, not a blind scrub-and-seal job. We use gentle, tested cleaning methods appropriate for your grout type, and we only recommend sealing once we’ve confirmed the surface is actually dry underneath. That matters, because sealing over trapped moisture just hides the problem until it shows up somewhere else.
If your deposits keep coming back, if you suspect a leak, or if you just want a guaranteed result instead of another weekend of scrubbing, book an inspection with Home Service Simple’s tile and grout cleaning team in Wichita, KS, backed by our satisfaction guarantee.
Sources
- White Residue | Tile Council of North America
- The causes and cures of grout efflorescence (MAPEI technical document)
- LATICRETE technical bulletin on efflorescence
- Tile Efflorescence: A Guide to Causes, Removal & Prevention (Original Mission Tile)
FAQ
How Do You Fix Efflorescence in Grout?
Start by dry-brushing, then clean with water and a stiff brush, moving to a neutral cleaner and finally a sulfamic-acid cleaner only if deposits persist. If it keeps returning, the fix is diagnosing and stopping the moisture source, not repeated cleaning.
Will Efflorescence Eventually Go Away on Its Own?
Efflorescence tied to curing moisture in a new installation often fades within weeks to months as the substrate dries out fully. Efflorescence tied to an ongoing leak or drainage issue won’t stop until that moisture source is fixed.
What’s a Good Efflorescence Remover for Grout?
Plain water and a neutral pH cleaner solve most mild cases. For stubborn deposits, sulfamic-acid-based products like those in the UltraCare line are a common trade choice, used sparingly and always tested on a small area first.
Can You Tile Over Efflorescence?
Tiling directly over active efflorescence isn’t a good idea, since the salts and the moisture behind them can keep migrating and cause the same white residue to reappear on the new surface. The underlying moisture and salt source needs to be addressed first, which is exactly the kind of diagnostic check Home Service Simple performs before recommending any sealing or repair.