

Don’t put that mattress protector back on until both the mattress and the protector are bone dry and checked over for damage. Skip that step and you’re basically sealing moisture into the mattress, which is exactly what mold loves. The EPA says damp materials should dry out within 24 to 48 hours to keep mold from setting up shop, so check your care label, give everything a good look, then recover.
TL;DR:
- Ensure both the mattress and protector are completely dry and free of damage before re-covering to prevent mold growth.
- Use touch, smell, and moisture tests, or a moisture meter to confirm thorough drying, especially on foam mattresses that hold moisture deep inside.
- Open windows, use fans and a dehumidifier, and elevate or flip the mattress to speed up drying without risking warping or damage.
- Wash mattress protectors gently with mild detergent at low heat, and check the care label for specific instructions to avoid damaging waterproof layers.
- Regular inspections for tears, pinholes, or stains are essential; replacing covers or cleaning mattresses is necessary if liquid penetrates or damage is visible.
Table of Contents
- When to put the protector back: practical dryness tests and timing
- How to speed-dry a mattress safely after cleaning
- How to launder and dry mattress protectors properly after mattress cleaning
- Inspecting protectors and mattresses: what to look for and when to replace
- Quick checklist: step-by-step before you re-cover the mattress
- Pro tips and when to call a professional
- Editorial take on drying it right the first time
- Book a mattress-cleaning or inspection with Home Service Simple
- FAQ
- Sources
When to put the protector back: practical dryness tests and timing
Here’s the thing about “dry”: surface dry and actually dry are two different animals. You can press your palm on top of a mattress and feel nothing, while the seams, the quilting, and the foam underneath are still holding water like a sponge. That’s where the trouble hides.
The EPA’s mold guidance points to drying everything within 24 to 48 hours as the target, and keeping indoor humidity in the 30% to 50% range helps speed that along. A sticky, humid bedroom turns a one-day dry into a three-day dry real quick.
Before you recover anything, run these checks:
- Touch test: press firmly on the seams, piping, and underside, not just the center of the mattress.
- Smell test: a musty or sour smell means moisture is still trapped somewhere you can’t see.
- Press and release: push down on a damp-feeling spot and watch for any dampness that wicks back up.
- Moisture meter (optional): a cheap pinless meter gives you a number instead of a guess, especially useful on foam.
Foam and latex mattresses take longer than innerspring because the material itself holds moisture deep inside. The same goes for a mattress that got a full steam clean versus one that just had a spot treatment, and humid weather slows everything down no matter what you’re working with.
How to speed-dry a mattress safely after cleaning
You don’t have to just sit around waiting. A few smart moves can knock hours off your drying time.
- Open the room up. Cross-ventilation from two windows moves air far better than one fan blowing into a closed space.
- Point box fans directly at the damp areas. Angle them low, across the surface, not just hovering above it.
- Run a dehumidifier. Aiming for indoor relative humidity under 50% lines up with EPA guidance and pulls moisture out of the air so the mattress isn’t fighting a losing battle.
- Prop it up. Elevate the mattress on risers or lean it against a wall so air reaches the underside, and flip or rotate it to dry both faces evenly.
- Skip the heat shortcuts. No hair dryers on seams, no blasting direct sun on foam. Heat can warp foam cells and crack waterproof backing faster than it dries anything.
A simple spot clean on an innerspring mattress might be dry in 4 to 6 hours with good airflow. A full steam clean, especially on foam, can run closer to the full 24 to 48 hour window the EPA recommends.
Pro Tip: Run the dehumidifier in the bedroom overnight even after the mattress looks dry. Trapped humidity in the room undoes your progress faster than you’d think.
How to launder and dry mattress protectors properly after mattress cleaning
The protector needs its own care plan, and the care label is your first stop every single time. Waterproof backings, especially the polyurethane kind, don’t forgive high heat the way plain cotton does.
- Check the label before anything else. Some waterproof protectors need cold water and gentle cycles only.
- Wash on gentle with mild detergent. An HE liquid detergent works well and rinses cleaner than powder.
- Spin out the extra water. A longer spin cycle cuts your drying time without extra heat.
- Dry low or air-dry. High heat is the number one killer of waterproof backing, according to Sleep Foundation guidance on washing mattress protectors.
- Treat stains before washing. A cold water rinse followed by a vinegar and baking soda soak, or an enzyme cleaner for anything biological, lifts most stains without needing bleach, per Tom’s Guide’s washing steps.
Some specialty fabrics come with their own rules. Crypton’s care guide calls for cold water with HE detergent and a tumble dry on low, which is a good reminder that “machine washable” doesn’t mean “wash it like a towel.”
Most households do fine washing a protector every one to two months, but spills, illness, or pet accidents mean an immediate wash, no waiting for the regular rotation. If you’re dealing with a urine accident specifically, our guide on cleaning mattress urine walks through the faster version of this process.
Inspecting protectors and mattresses: what to look for and when to replace
Before anything goes back on the bed, give both pieces a real once-over, not a glance.
- Pinholes and cracked backing: hold the protector up to a window. Light coming through means the waterproof layer is compromised.
- Tears or loose elastic: a protector that won’t stay anchored lets spills sneak underneath anyway.
- Staining visible through the fabric: if you can still see a shadow of the stain, it likely means liquid reached the mattress layer beneath it.
- Mattress seams and underside: check for lingering dampness, discoloration, or odor that wasn’t there before cleaning.
The FDA’s guidance on mattress covers recommends inspecting covers and the mattress beneath for wet spots, cuts, or staining every time the cover comes off, and replacing any cover showing damage. If liquid made it past the protector into the mattress itself, washing the protector alone won’t solve the problem. That calls for a deep clean of the mattress and a follow-up check, not just a fresh cover.
A lingering odor after full drying, visible soft spots, or signs the liquid soaked through are red flags that this is bigger than a simple wash and dry.
Quick checklist: step-by-step before you re-cover the mattress
Run through this before you make the bed again:
- Confirm the mattress is dry. Touch and smell the seams and underside, not just the top surface.
- Confirm the protector is dry and intact. No damp spots, no pinholes, no cracked backing from the wash.
- Do a fit check. Make sure corners, zippers, and elastic sit snug with no gaps where spills could slip through.
- Keep a spare on hand. A second protector means you’re never tempted to recover a mattress before it’s truly ready.
Pro tips and when to call a professional
On the job, a surface touch test alone is not reliable. It’s important to check seams, quilting, and the underside, sometimes using a moisture meter, because foam holds water in ways you can’t always feel from the top.
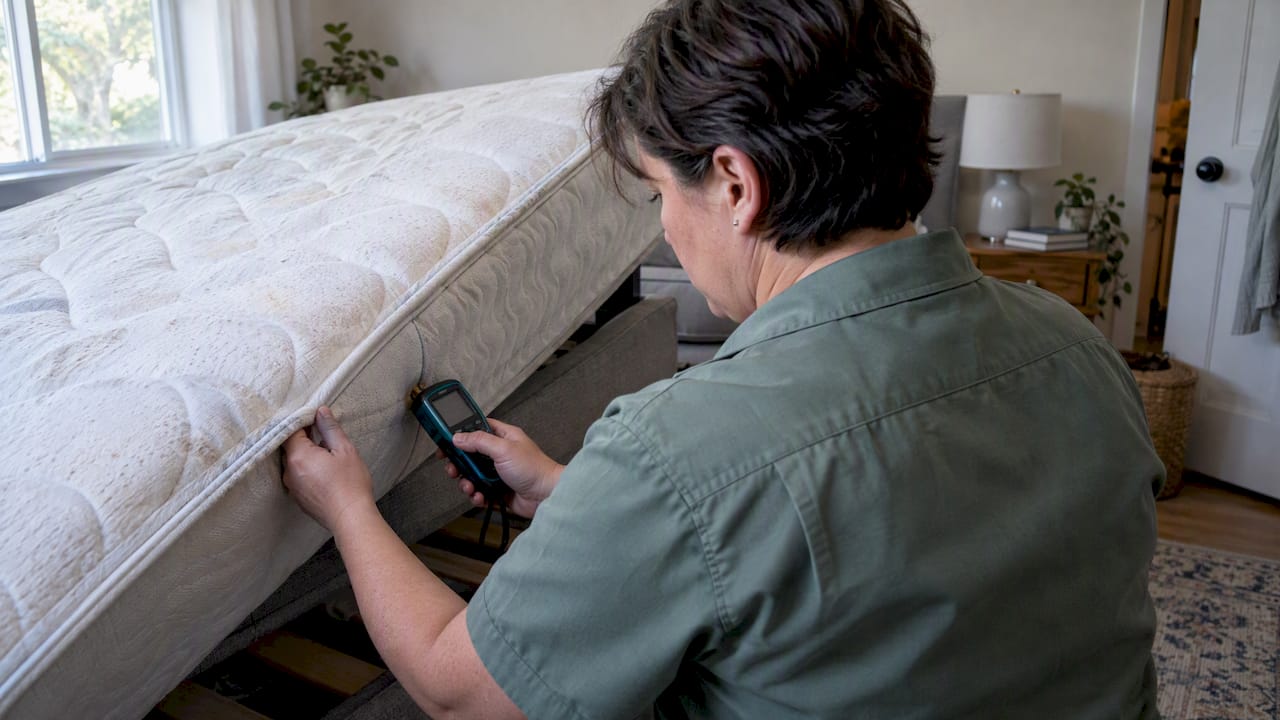
For a light spot clean, air drying at home with a fan usually gets the job done. For a heavy soak, pet accidents, or a full steam clean that’s gone deep into the foam, professional extraction and commercial drying equipment pull out far more moisture than a box fan ever will, and that shortens the real risk window instead of just guessing at it.
One habit we recommend to every homeowner: keep a backup protector in the closet. It takes the pressure off rushing a damp one back onto the bed. If you’re dealing with a soak that seems bigger than a spot clean can handle, our mattress cleaning service page has more on what a deeper clean involves.
Editorial take on drying it right the first time
Most of the advice out there treats “24 hours” like a magic number, and that’s where people get tripped up. Drying time isn’t a countdown clock, it’s a condition. A foam mattress in a humid Kansas July and an innerspring mattress by an open window in October are not on the same timeline, even if both got the exact same steam clean.
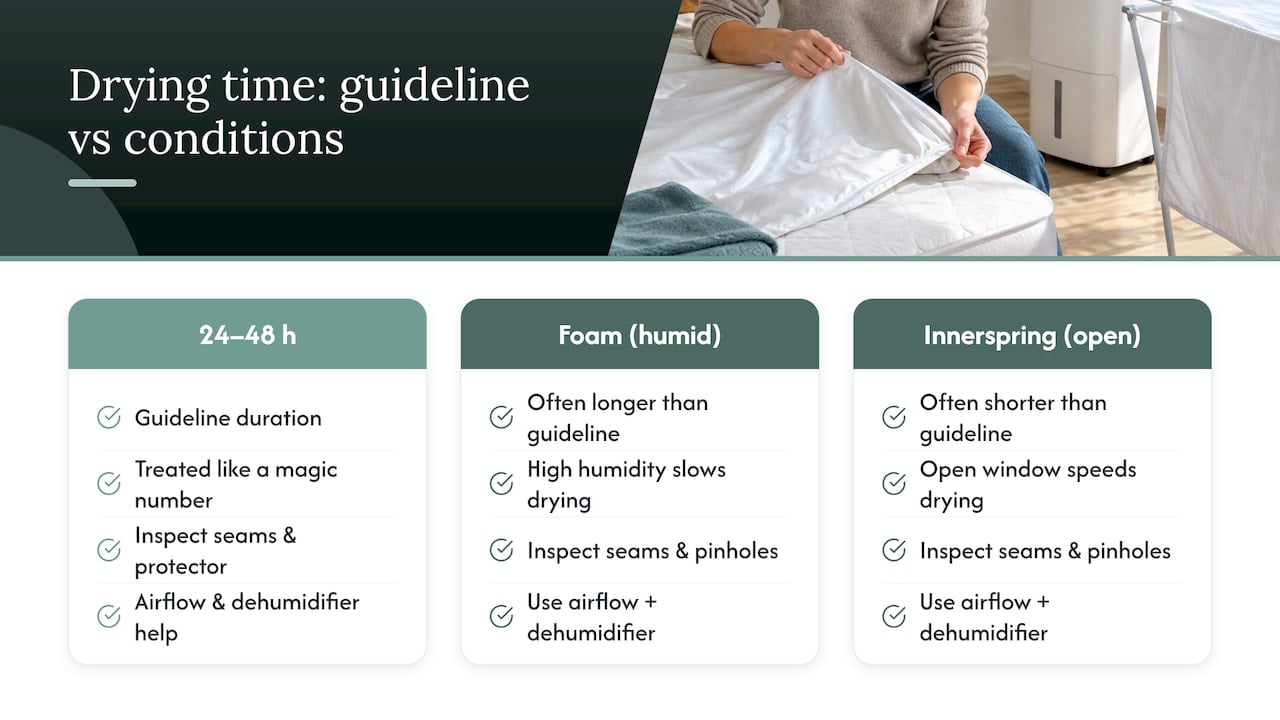
The bigger mistake isn’t impatience, it’s skipping the inspection. People check if the mattress feels dry and call it done, without ever checking the seams or holding the protector up to the light for pinholes. That’s the step the FDA guidance keeps hammering, and it’s the one shortcut that actually causes problems down the line.
If there’s one thing worth prioritizing, it’s this: airflow and a dehumidifier do more real work than waiting around hoping time alone will dry things out. Humidity control speeds up everything else.
— chris
Book a mattress-cleaning or inspection with Home Service Simple
If a stain, an accident, or just years of use have you second-guessing what’s living in that mattress, we offer professional mattress cleaning built around getting things actually dry, not just surface dry. Our team handles stain and odor removal and checks for the kind of hidden damage a quick glance at home might miss.

Heavy soaks and lingering odors are situations where professional extraction and drying can be beneficial, as commercial equipment pulls moisture out faster and more completely than home fans alone. Some providers offer satisfaction guarantees, and subscription cleaning plans are available to keep routine care on autopilot.
Ready to get your mattress properly clean and dry? Visit our mattress cleaning service page to book.
FAQ
Do I need to wash my mattress protector before using it?
Washing a new protector before first use removes manufacturing residue and any loose fibers, though it’s not strictly required for safety. Checking the care label first tells you whether cold wash and low heat dry apply to your specific material.
What happens if I sleep on my mattress before it’s fully dry?
Sleeping on a damp mattress traps moisture between your body heat and the mattress core, creating conditions mold needs to grow. The EPA recommends drying damp materials within 24 to 48 hours specifically to avoid this risk.
How do I get a mattress protector white again?
Pretreating with a cold water rinse followed by a vinegar and baking soda soak, or an enzyme cleaner for organic stains, lifts most discoloration without bleach, which can damage waterproof backing. Washing on a gentle cycle with mild detergent and avoiding high heat when drying helps keep the fabric from yellowing further, per Tom’s Guide’s care steps.
Can you use a mattress protector without washing it first?
Yes, many protectors are fine to use straight out of the packaging if the care label doesn’t say otherwise. Just make sure the mattress underneath is already clean and dry before you put a fresh protector on top of it.
Sources
These are the primary references behind the drying, washing, and inspection guidance covered above, useful if you want to dig into the details yourself.
- Brief guide to mold, moisture, and your home — U.S. EPA
- How to wash a mattress protector — Sleep Foundation
- Covers for hospital bed mattresses: learn how to keep them safe — FDA
- How to wash a mattress protector — Tom’s Guide