

If you see substantial visible mold on hard-surface ducts or smell a persistent musty odor every time your system kicks on, stop the HVAC and get an inspection. That’s the short answer. The EPA is clear: routine duct cleaning is not recommended, but when there’s actual visible mold growth or major contamination, you act.
Here’s your quick decision guide:
- Stop the system if you suspect active contamination — running it spreads spores room to room.
- Do a visual check at registers and accessible duct sections before calling anyone.
- Call a pro if you find visible growth inside hard-surface ducts, moldy insulated flex duct, or if occupants have worsening respiratory symptoms tied to time spent indoors.
- Don’t rely on industry scare stats. The EPA cautions that prevalence claims from duct cleaning vendors are often unsupported by peer-reviewed research.
“The key to mold control is moisture control. If mold is a problem in your home, you should clean up the mold promptly and fix the water problem.” — US EPA
Keep indoor relative humidity below 60%—ideally between 30% and 50%—to reduce moisture and prevent mold growth. That single number is your most powerful prevention tool.
Table of Contents
- Why mold in air ducts is a bigger deal than dirty vents
- How to inspect your ducts and HVAC for mold
- How to remove mold from air ducts: DIY limits and what pros actually do
- What equipment and methods actually work
- What mold remediation in air ducts typically costs
- When to hire a pro and how to vet them
- How to prevent mold from coming back
- Should you test for mold in ducts?
- What EPA, CDC, and health experts actually recommend
- Key Takeaways
- The part most homeowners get wrong about duct mold
- Homeservicesimple can help Wichita homeowners tackle duct mold
- Useful sources for further reading
- FAQ
Why mold in air ducts is a bigger deal than dirty vents
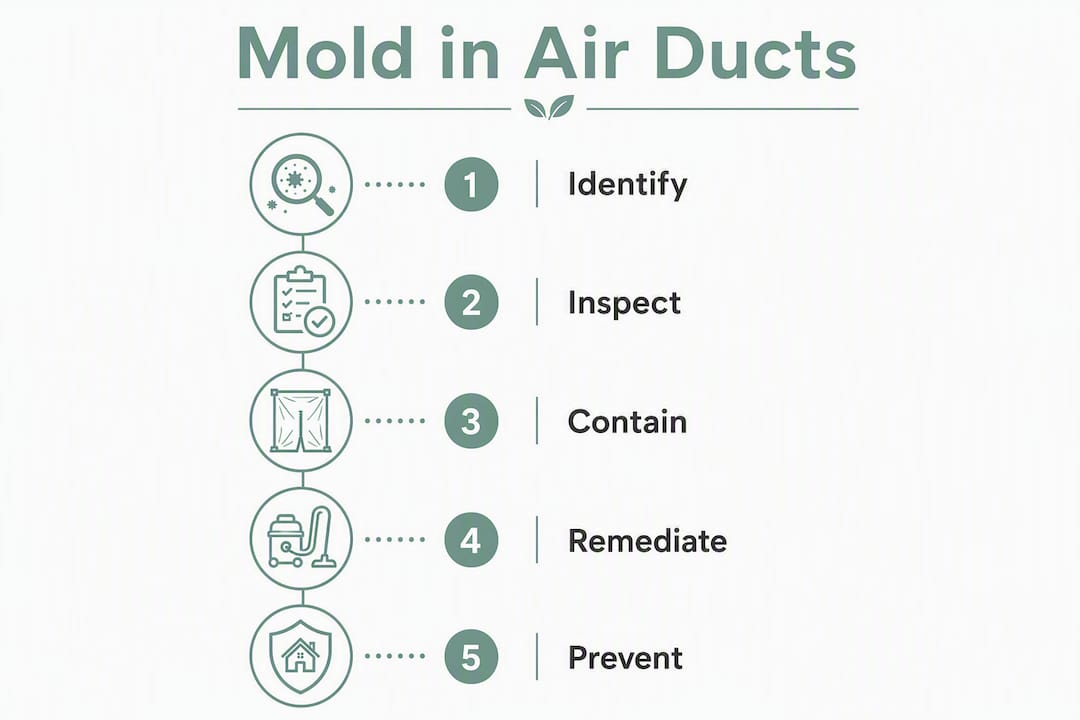
Mold in ductwork doesn’t stay put. Every time your HVAC runs, it pulls air across contaminated surfaces and pushes spores into every room in the house. That’s what makes it different from a patch of mildew on a bathroom tile.
The CDC links mold in damp indoor environments to coughing, wheezing, worsening asthma, and in some cases hypersensitivity pneumonitis. Symptoms often improve when people leave the building, which is one of the clearest signs the indoor environment is the problem.
Some people are hit harder than others. The groups most at risk include:
- Children, whose lungs are still developing
- Elderly adults with reduced immune function
- People with asthma or chronic respiratory conditions
- Anyone who is immunocompromised (chemotherapy patients, organ transplant recipients)
“Research has found that people who spend time in damp buildings report health problems including respiratory symptoms and infections, developing or worsening asthma, hypersensitivity pneumonitis, allergic rhinitis, and eczema.” — CDC NIOSH
Individual responses vary a lot. One person in the house may have constant sinus issues while another feels nothing. That variability is exactly why the CDC recommends removing visible growth promptly rather than waiting for everyone to get sick. Testing alone cannot predict who will develop symptoms.
Pro Tip: If allergy or asthma symptoms in your household consistently improve when family members spend time away from home, that pattern is worth taking seriously as a potential indoor air quality signal.
How to inspect your ducts and HVAC for mold
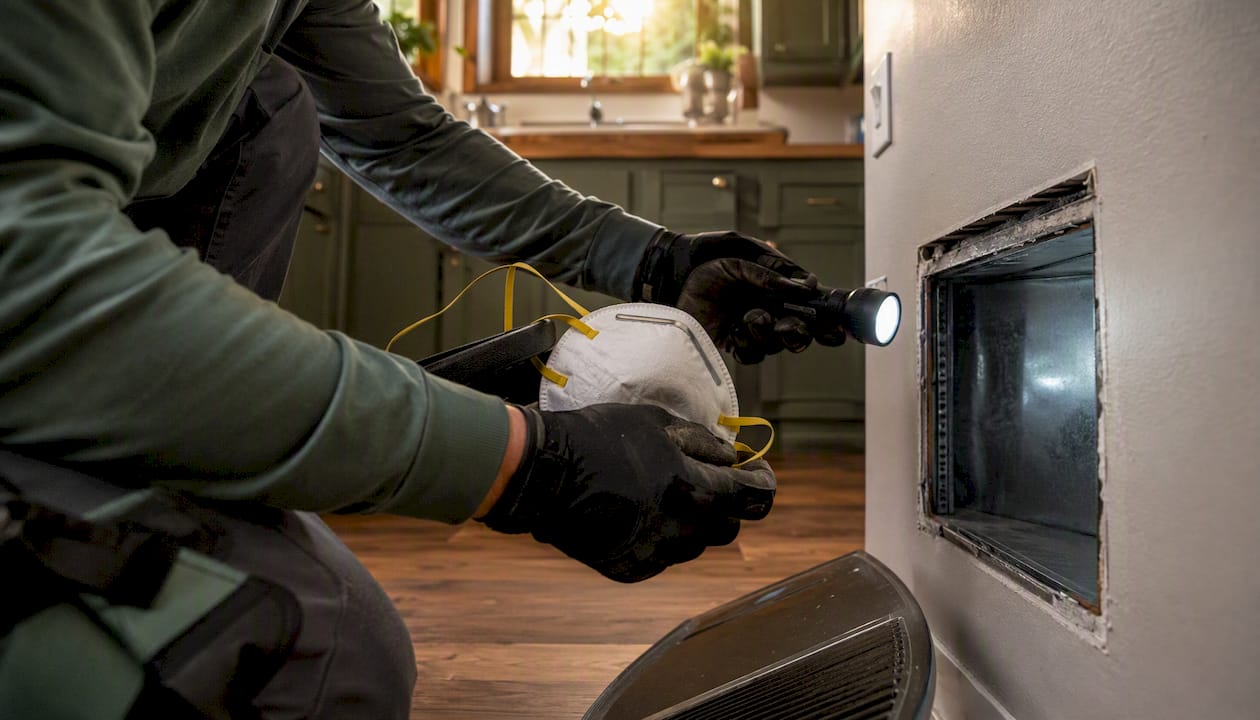
You don’t need special equipment to do a solid first-pass inspection. You need a flashlight, a screwdriver, your nose, and about 30 minutes.
What to look and smell for first
Three signals point strongly toward mold in the ventilation system:
- A musty, earthy odor that appears or intensifies when the HVAC runs
- Visible dark spots, fuzzy growth, or discoloration at or just inside supply and return registers
- Household allergy or respiratory symptoms that worsen indoors and ease outdoors
Step-by-step inspection checklist
- Turn the system off before you remove any registers or open any panels.
- Remove a supply register with a screwdriver and shine a flashlight inside. Look at the first 12–18 inches of duct wall for dark spots, fuzzy growth, or heavy debris.
- Check the return air grille the same way. Returns pull air in and tend to collect more dust and moisture.
- Inspect the air handler cabinet. Open the access panel and look at the blower wheel and the area around the evaporator coil for visible growth or heavy moisture staining.
- Look at the condensate drain pan under the coil. Standing water or slime in the pan is a red flag.
- Photograph everything you find. Clear photos help a pro assess severity before they arrive and give you documentation for insurance if needed.
- Check flexible insulated ducts in the attic or crawlspace for sagging, tears, or moisture staining on the outer jacket.
Real mold vs. common look-alikes
What homeowners often mistake for mold is accumulated dust, dark insulation fibers, or rust staining. Real mold tends to have a fuzzy or powdery texture and often appears in irregular patches, not uniform smudges. Only a lab analysis can make a definitive identification, but the visual and smell combination is usually enough to justify action.
Pro Tip: Wear an N95 respirator and nitrile gloves during any close-up inspection. Don’t run the system while you’re poking around — you don’t want to breathe whatever gets dislodged.
How to remove mold from air ducts: DIY limits and what pros actually do
Here’s the honest answer on DIY: limited surface wiping on hard metal ducts with a diluted detergent solution can address very small, accessible spots. But if the mold is inside insulated flex duct, on duct liner, or covers more than a small area, you’re past DIY territory. The EPA is explicit that porous or internally lined ductwork that becomes moldy cannot be effectively cleaned and must be removed and replaced.
DIY vs. professional remediation at a glance
| Factor | DIY (limited) | Professional remediation |
|---|---|---|
| Scope | Small, accessible hard-surface spots only | Full system, including coil, pan, and all duct sections |
| Containment | None | Negative pressure, HEPA filtration |
| Porous ducts | Cannot address | Removes and replaces contaminated sections |
| Moisture fix | Homeowner must identify and fix | Included in professional scope |
| Cost | Low (materials only) | $600–$2,000+ depending on scale |
| Effectiveness | Limited | High when moisture source is also fixed |
What professional remediation looks like, step by step
- Full inspection and documentation — photos, moisture readings, identification of contaminated components.
- HVAC shutdown — the system stays off throughout the job to prevent spreading spores.
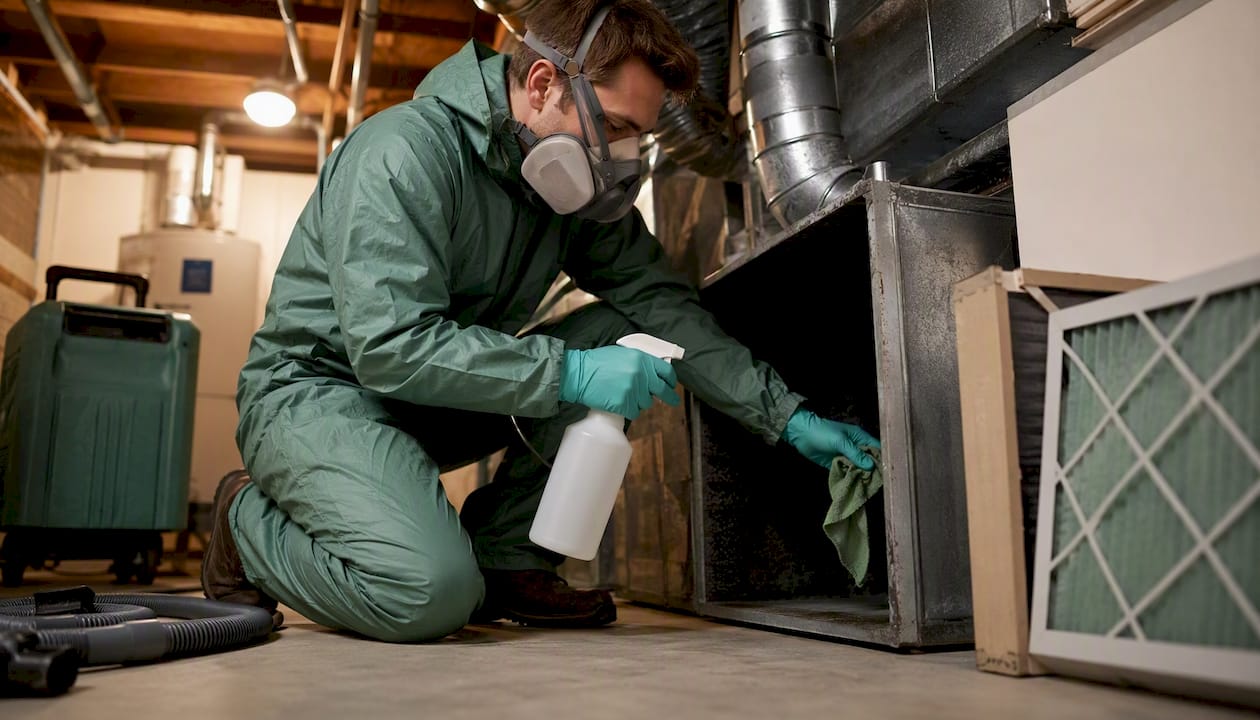
- Containment setup — plastic sheeting, negative pressure, and HEPA air scrubbers to protect the rest of the home.
- Moisture source identification and repair — clogged condensate drains, improper drain pan slope, duct leaks, or high indoor humidity. Skipping this step guarantees regrowth.
- Cleaning or removal — hard-surface metal ducts get mechanical agitation and HEPA vacuuming; contaminated insulated or flex ducts get cut out and replaced.
- Coil and pan cleaning — the evaporator coil and drain pan are cleaned and treated.
- Verification — visual re-inspection and, when warranted, post-remediation air or surface sampling.
“Remediation activities should be scheduled when the building is unoccupied to avoid aerosolizing spores and spreading contamination.” — US EPA HVAC Remediation Guidance
Warning: No EPA-registered biocide is approved for use on lined ductwork. If a contractor proposes spraying a “mold-killing” product inside insulated flex duct instead of replacing it, that’s a red flag.
What equipment and methods actually work
Mechanical removal plus moisture control is the only combination that reliably solves mold in HVAC systems. Everything else is either a complement to that approach or a gimmick.
Here’s a breakdown of common tools and methods:
- Rotary brushes with high-powered vacuums: The workhorse of duct cleaning. Mechanical agitation dislodges debris and growth from hard-surface duct walls; the vacuum captures it. Effective on sheet metal ducts.
- HEPA vacuums: Non-negotiable for any mold work. Standard shop vacs exhaust fine particles back into the air. HEPA filtration captures spores down to 0.3 microns.
- Negative pressure containment: Pros set the work area at lower pressure than surrounding rooms so air flows toward the work, not away from it. This keeps spores from migrating.
- HEPA air scrubbers: Run continuously during and after the job to filter airborne particles from the work area.
- Evaporator coil cleaning: Chemical coil cleaners remove biofilm and debris from the coil surface. Paired with condensate drain treatment, this addresses one of the most common mold growth sites in the whole system.
- UV-C lights at the coil: A legitimate complement, not a cure. UV-C can inhibit surface growth on the coil between cleanings, but it doesn’t clean existing contamination and has no effect on duct walls.
Methods to avoid
- Ozone generators: — Ozone at concentrations high enough to kill mold is harmful to people, pets, and rubber components in the HVAC system. The EPA does not recommend ozone generators for occupied spaces.
“Mold remediation involving a heating, ventilation and air conditioning (HVAC) system should be done only by professionals experienced in working with HVAC systems.” — US EPA Mold Course
Pro Tip: Before hiring anyone, ask directly: “Will you shut down the HVAC during the job?” and “Do you use HEPA filtration and negative pressure containment?” A contractor who hesitates on either question is worth skipping.
What mold remediation in air ducts typically costs
A limited duct cleaning on hard-surface metal ducts in a single-story home generally costs several hundred to a few thousand dollars based on consumer market data. Larger jobs involving duct replacement, coil work, or moisture repairs push costs higher.
Cost and timeline for mold remediation vary widely depending on the scope of work, from inspection and assessment to full system remediation and moisture repairs.
Factors that move the price up or down:
- Extent of contamination — a few registers vs. the whole system
- Duct material — sheet metal cleans; flex duct gets replaced
- Access difficulty — attic or crawlspace runs cost more to reach
- Moisture repairs needed — fixing a condensate drain is cheap; rerouting ductwork is not
- Local labor rates — Wichita, KS rates differ from coastal metros
Always get a written scope of work before signing anything. A reputable contractor will itemize what gets cleaned, what gets replaced, and what moisture fixes are included.
When to hire a pro and how to vet them
Call a professional if any of these apply:
- Visible mold growth inside hard-surface ducts covering more than a small patch
- Any mold in insulated or flexible ductwork (replacement required)
- History of water damage, flooding, or a known leak near the HVAC
- Occupants experiencing respiratory symptoms that improve away from home
- A musty odor that persists after changing filters and cleaning registers
Questions to ask before you hire
- Do you shut down the HVAC during the job?
- What containment do you use — negative pressure, plastic sheeting, HEPA scrubbers?
- Will you replace moldy flex or insulated duct, or just clean it?
- Can you show me photos of the contamination before and after?
- Do you provide a written scope of work and warranty?
- Are you familiar with NADCA standards or do you hold ACAC/IAQ credentials?
- Are you licensed and insured in Kansas?
Red flags to watch for
- Pressure-sales tactics or urgency claims without showing you photos of actual contamination
- Blanket statements like “all homes have mold in the ducts” with no inspection
- Promises to treat lined ductwork with a spray instead of replacing it
- Proposals to use ozone generators inside the system
- Refusal to provide a written scope or references
Get at least two or three quotes. The lowest bid isn’t always the problem — a bid that skips containment or moisture repair is the one to walk away from.
How to prevent mold from coming back
Control moisture and you control mold. That’s not a simplification; it’s the whole game.
Keep indoor relative humidity in the 30–50% range year-round. If humidity rises above 60%, mold has everything it needs to grow on virtually any surface in your duct system.
Prevention checklist
- Run a whole-home dehumidifier or portable units in humid seasons
- Use exhaust fans vented to the outdoors in bathrooms and the kitchen
- Make sure your HVAC is correctly sized — an oversized unit short-cycles and leaves moisture in the air
- Clean or replace air filters every 1–3 months depending on household conditions
- Have the evaporator coil professionally cleaned annually
- Inspect and flush the condensate drain line every spring before cooling season
- Seal and insulate ductwork in unconditioned spaces (attics, crawlspaces) to prevent condensation
- Keep dryer vents clear and vented to the exterior
Annual maintenance schedule
- Every 1–3 months: Check and replace air filters.
- Spring (before cooling season): Flush condensate drain line, inspect drain pan, check coil for debris.
- Fall (before heating season): Inspect duct connections in accessible areas, check insulation on flex ducts.
- Annually: Schedule a professional coil cleaning and HVAC tune-up.
- After any water event: Inspect HVAC components within 24–48 hours. Water-damaged areas that aren’t dried quickly become mold growth sites.
Pro Tip: In Kansas summers, humidity spikes fast. Run your dehumidifier on a set point rather than manually — set it to 50% and let it work automatically so you’re not chasing humidity levels by hand.
Should you test for mold in ducts?
Testing is rarely required before you act. Visible growth or health symptoms tied to indoor time are enough to justify remediation. Testing is most useful when you need to document mold type for an insurance claim, confirm post-remediation clearance, or rule out other causes of health symptoms.
When to test vs. when to just remediate
- Visible mold present: — Skip the test. Remediate. The CDC is clear that sampling cannot predict who will get sick, so the health-centered recommendation is to remove visible growth promptly.
“A positive determination of whether a substance is mold or not can be made only by an expert and may require laboratory analysis for final confirmation.” — US EPA
Pro Tip: If you test, use an independent lab — not one affiliated with the contractor doing the remediation. Photograph the exact location you sampled so results map to visible conditions. Vendor-provided sampling has an obvious conflict of interest.
What EPA, CDC, and health experts actually recommend
The federal guidance on HVAC mold is consistent and clear: clean when there’s substantial visible mold on hard surfaces, replace porous materials that are contaminated, and fix the moisture source every single time.
Key guidance points:
- EPA: Consider duct cleaning only when there is substantial visible mold growth on hard-surface ducts or other HVAC components. Routine cleaning is not recommended.
- EPA: Porous or internally lined ductwork that is moldy must be removed and replaced, not treated with biocides.
- EPA: Fixing the moisture source is not optional. Cleaning without addressing the root cause guarantees regrowth.
- CDC: Mold exposure is associated with respiratory symptoms, worsening asthma, and hypersensitivity pneumonitis. Individual responses vary, so prompt removal of visible growth is the recommended action.
- CDC/MMWR: After floods or major water intrusion, HVAC components that were submerged should be inspected, cleaned, and disinfected by qualified professionals with the system shut down beforehand.
“Known or suspected mold growth in HVAC ducts or other system components should be investigated and resolved promptly.” — US EPA Mold Web Course
Your three immediate actions if you suspect mold in your HVAC:
- Stop the system to prevent spreading spores.
- Inspect and photograph visible growth, odor sources, and any moisture damage.
- Fix the moisture source and hire a vetted professional for anything beyond a small hard-surface spot.
Key Takeaways
Mold in air ducts requires fixing the moisture source first; cleaning alone without addressing the root cause will always result in regrowth.
| Point | Details |
|---|---|
| Stop the system first | Shut down HVAC when contamination is suspected to prevent spreading spores through the home. |
| Porous ducts must be replaced | Insulated or flex ductwork with mold cannot be cleaned; EPA guidance requires removal and replacement. |
| Fix moisture or it comes back | Condensate drains, duct leaks, and high humidity must be repaired as part of any remediation. |
| Testing is rarely required to act | Visible growth or health symptoms tied to indoor time justify remediation without waiting for lab results. |
| Homeservicesimple handles it locally | For Wichita, KS homeowners, Homeservicesimple provides air duct inspection, cleaning, and related services with a satisfaction guarantee. |
The part most homeowners get wrong about duct mold
Here’s what I see a lot: homeowners either panic over a little dust at a register and spend thousands unnecessarily, or they ignore a real musty smell for months because they don’t want to deal with it. Both are mistakes, and the EPA guidance actually helps you avoid both.
The conventional wisdom says “get your ducts cleaned every few years.” That’s not what the EPA says. Routine cleaning has not been shown to prevent health problems. What matters is whether there’s actual contamination, an actual moisture problem, or an actual health pattern in the household. If none of those are present, you probably don’t need to spend a dime on duct cleaning.
On the flip side, when mold is genuinely present in insulated flex duct, no amount of spraying or brushing fixes it. Replacement is the only answer, and any contractor who tells you otherwise is either misinformed or cutting corners. The EPA’s position on this is not ambiguous.
The other thing people underestimate is how fast mold can establish after a water event. The EPA and CDC both note that water-damaged materials need to be dried within 24–48 hours to prevent growth. If your condensate line backed up last summer and you didn’t know it for a week, that’s worth a professional look, even if you can’t see anything obvious.
Trust the federal guidance over vendor marketing. Inspect before you spend. Fix the moisture. Replace what can’t be cleaned. That’s the whole playbook.
Homeservicesimple can help Wichita homeowners tackle duct mold
Dealing with mold in your HVAC system is stressful, especially when you’re not sure what you’re looking at or who to trust. Homeservicesimple works with homeowners right here in Wichita, KS to take the guesswork out of it.

The team at Homeservicesimple provides professional air duct cleaning and inspection services, with a focus on finding the real source of the problem, not just running a brush through the system and calling it done. Services include:
- Air duct inspection and assessment — documented findings so you know exactly what you’re dealing with
- Professional duct cleaning for hard-surface duct systems using proper equipment and containment
- Coil and drain pan service to address one of the most common mold growth sites in residential HVAC
- Flexible and insulated duct evaluation with honest guidance on when replacement is needed
Homeservicesimple backs every job with a satisfaction guarantee, and the team’s local focus means you’re working with people who know Wichita homes, not a national franchise that sends a different crew every time. Check out customer reviews and book a service to get a professional set of eyes on your system before the next cooling season.
Useful sources for further reading
These are the primary sources used throughout this article. When in doubt, go to EPA and CDC guidance first — not industry marketing pages.
- Should You Have the Air Ducts in Your Home Cleaned? | US EPA — The definitive federal guide on when duct cleaning is warranted, when it isn’t, and what to do about mold in porous vs. hard-surface ducts.
- Mold: About Mold | CDC — CDC overview of health effects, who is most vulnerable, and why prompt removal of visible growth is recommended.
- Health Problems | Mold | CDC NIOSH — Detailed breakdown of respiratory and allergic health effects linked to damp building environments.
Prioritize EPA and CDC guidance over anything published by a duct cleaning company or remediation vendor. Federal sources have no financial interest in whether you book a service.
FAQ
How do you get rid of mold in air ducts?
Hard-surface metal ducts with limited mold can be cleaned by a professional using mechanical agitation and HEPA vacuuming, but the moisture source must be fixed at the same time. Insulated or flexible ductwork with mold must be removed and replaced, per EPA guidance — no cleaning method is effective on porous duct materials.
How much does mold remediation in air ducts cost?
A professional duct cleaning for limited mold on hard-surface ducts typically runs $600–$1,200; full system remediation including coil work and duct replacement can reach $1,500–$4,000 or more depending on the scale of contamination, duct material, and any moisture repairs needed.
What are the symptoms of mold in the air?
The CDC links mold exposure to coughing, wheezing, worsening asthma, allergic rhinitis, and in some cases hypersensitivity pneumonitis. A strong signal is symptoms that improve when you spend time away from the home, which suggests the indoor environment is the source.
Does routine duct cleaning prevent mold?
No. The EPA states that studies have not shown routine duct cleaning prevents health problems, and routine cleaning is not recommended. Cleaning is warranted only when there is substantial visible mold, heavy debris, or pest infestation in the system.
Can Homeservicesimple help with air duct mold in Wichita?
Yes. Homeservicesimple provides professional air duct inspection and cleaning services for homeowners in Wichita, KS, including assessment of contaminated duct sections and coil service, backed by a satisfaction guarantee.